
The Ultimate Lip Neutralization Transformation: From Brown Tones to Warm Blush
Dark lip neutralization and lip blush treatments are quickly becoming the most sought-after semi-permanent makeup solutions for achieving balanced, healthy-looking lip color without daily makeup application. If you have cool, dark, or uneven lip undertones and dream of a soft, warm blush shade, understanding the transformation process is key to achieving your ultimate lip goals.
Here is a step-by-step look into how dark lip correction works, what the lip blush healing process looks like, and why patience pays off.
What is Lip Neutralization vs. Lip Blush?
While standard lip blush tattoo treatments deposit pink, peach, or red pigments into lips with light, warm undertones, lip neutralization is a specialized color correction technique designed for melanin-rich lips or hyperpigmentation.
The goal of dark lip correction isn't to immediately add a decorative target color. Instead, artist experts use warm-toned pigments (like orange, yellow, or warm peach) to cancel out cool blue, purple, or brown undertones. Once the dark areas are lightened and balanced, a target lip blush color can be applied seamlessly.
       Dark / Cool Undertones (Blue, Purple, Brown)
                           │
                           ▼
     [Session 1: Color Correction with Warm Pigments]
                           │
                           ▼
          Neutralized, Lightened Base Tone
                           │
                           ▼
     [Session 2: Target Lip Blush Pigment Application]
                           │
                           ▼
        Final Warm, Radiant Lip Color Result
The Healing Process: Week by Week
Healing from permanent lip cosmetics is a journey. The dark lip neutralization process takes time, as pigment heals beneath the skin surface and color shifts during the skin regeneration cycle.
Days 1–3 (Bold & Bright): Immediately after your session, your lips will appear vibrant, warm, and swollen. The color will look much stronger than the final outcome.
Days 4–7 (Peeling Phase): Gentle flaking and peeling occur as the outer skin sheds. Do not pick or scratch your lips during this stage to avoid pigment loss or scarring.
Weeks 2–4 (The "Ghosting" Phase): After peeling, the color may temporarily look lighter, muted, or uneven. This is completely normal—the skin is thickening as it heals over the pigment.
Weeks 5–8 (Color Bloom): The pigment gradually pushes back up to the surface. By week 6, your fully healed lip color is revealed, showing a significantly lighter and warmer tone.
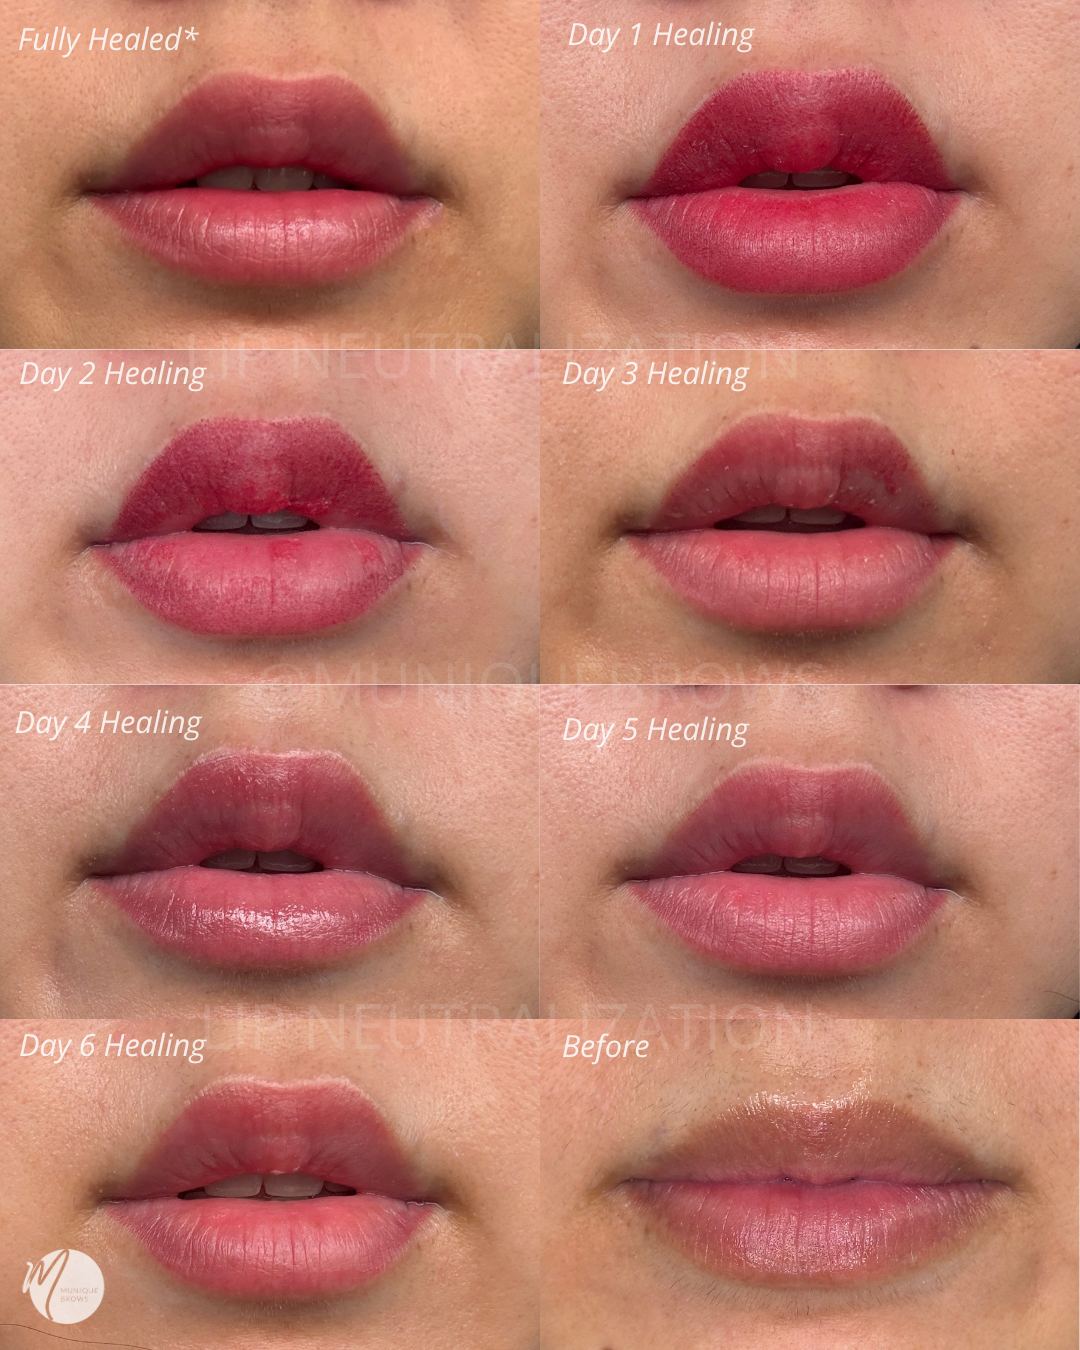
Top Left First Photo: Fully healed after session 2 (week 5) | Bottom Right Last Photo: Before Lip Neutralization Treatment
The 2-Session Transformation Result
Most successful lip neutralization and cosmetic lip tattoo transformations require at least 2 sessions spaced 8 weeks apart:
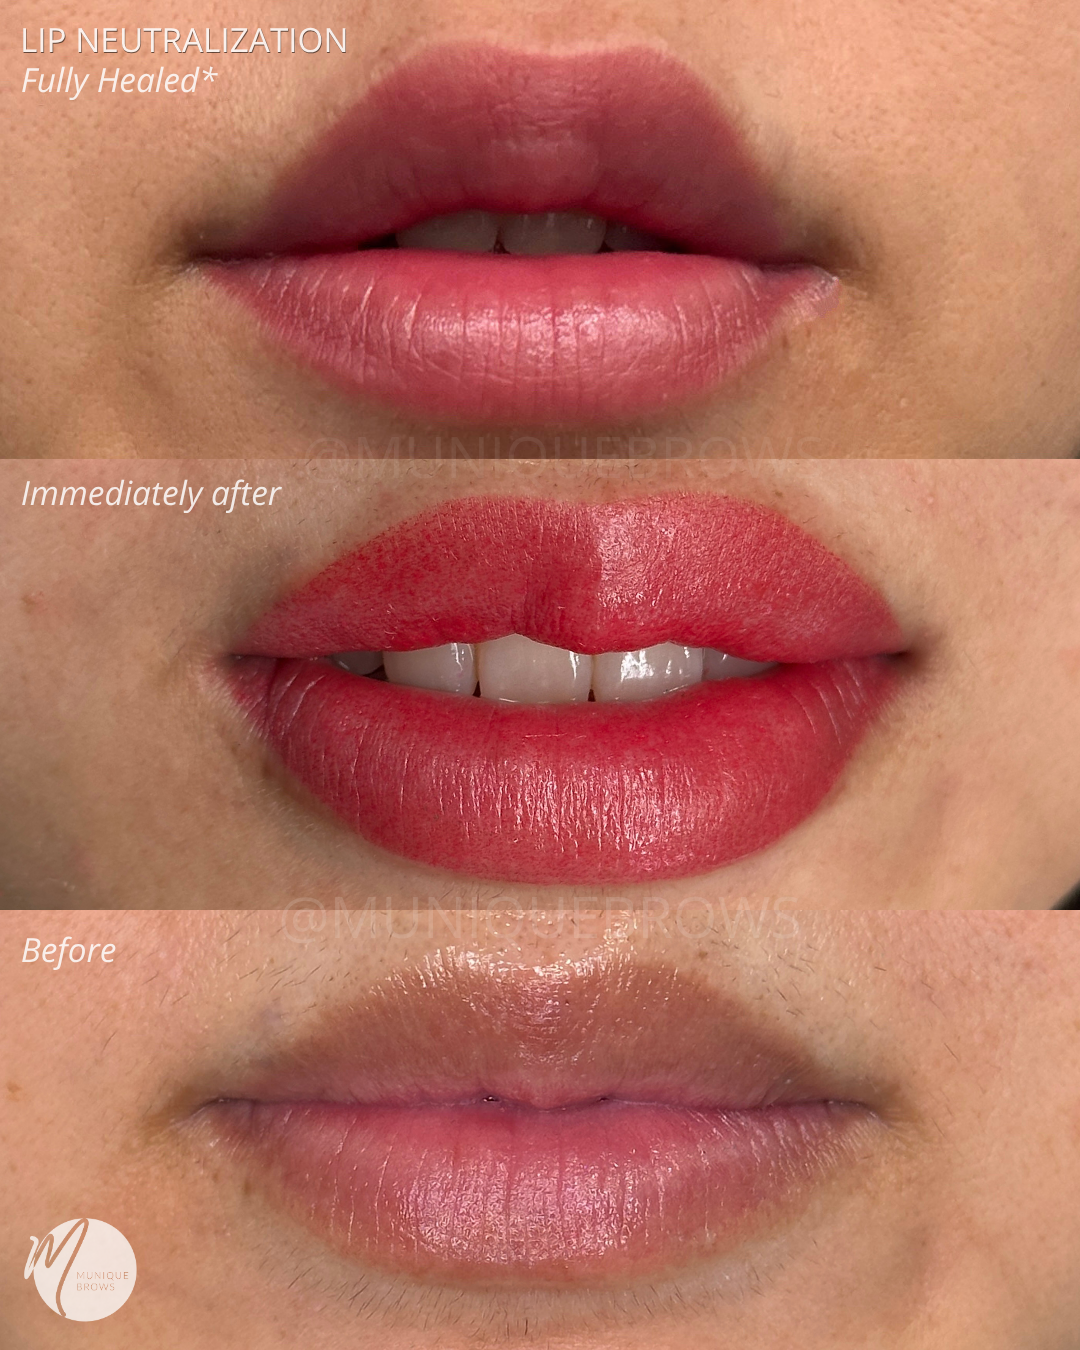
Session 1: Neutralizes hyperpigmentation, cancels deep blue or brown tones, and creates a uniform, warm base color.
Session 2: Perfects any remaining cool spots and applies your desired final target shade (such as nude pink, peach, or soft rose).
While many clients achieve their ideal outcome after two treatments, results vary from client to client. Total session count depends heavily on initial lip undertones, skin thickness, individual healing response, and aftercare diligence. Additional touch up session(s) may be needed.
Key Aftercare Tips for Best Healed Results
Keep Lips Moisturized: Apply the recommended healing ointment or lip balm frequently to prevent drying and cracking.
Avoid Spiced & Salty Foods: Protect healing skin from irritation during the first few days.
No Direct Sun or Swimming: UV rays and chlorine can severely fade fresh permanent makeup pigment.
Let Peeling Happen Naturally: Never pick at dry flakes; let them shed on their own to preserve color retention.
Are you ready to transform your dark or uneven lip tones into a radiant, low-maintenance shade? Booking a personalized consultation with a certified cosmetic tattoo artist is the first step toward customized, long-lasting results.
What target lip shade are you hoping to achieve with your lip neutralization journey?
